We're assuming that rhc setup ,because only then you have public key for communication to openshift server.
1.please check C:\Users\user\
2.do you find a folder as ".ssh"(this is the folder,where we generate public key by rhc setup)
3.if no,please
FOLLOW "rhc setup",here - RHC SETUP.
Install and Setup PuTTY SSH Client for Windows
Using SSH on Windows
PuTTY is a popular free SSH client for Windows. This document shows how to install and configure PuTTY so that you can connect to your application with SSH on a Windows machine.
Download the PuTTY Installer
Get the installer from the PuTTY download page
Make sure you download the latest stable release under the headers Binaries/A Windows installer for everything except PuTTYtel. It should be named something like putty-0.63-installer.exe.
Running the Installer
After downloading the installer, using File Explorer open up the folder you downloaded it to and double click on the icon to run the installer.
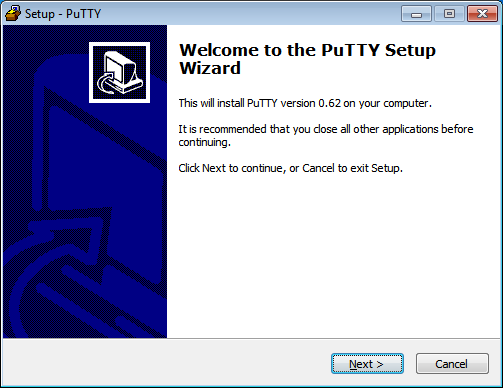
Step 1: You are greeted by the Welcome dialog. Click the Next > button to continue
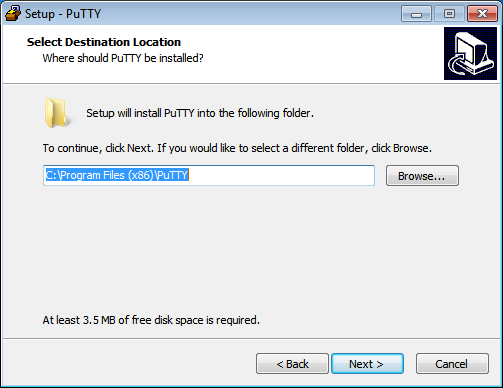
Step 2: The wizard asks you to select a directory to install PuTTY to. Use the default and click the Next > button to continue.
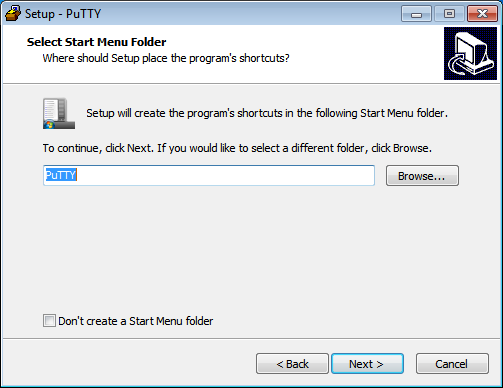
Step 3: The wizard asks which folder you wish to put PuTTY into on the Start Menu. Use the default and click the Next > button to continue.
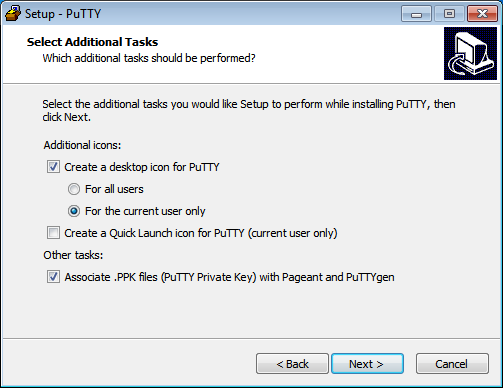
Step 4: You are asked additional questions. You can choose to have an icon placed on your desktop or on the Panel as a quick start button for easier access to PuTTY if you wish. We recommend keeping the option for associating .ppk files checked. Click theNext > button to continue.
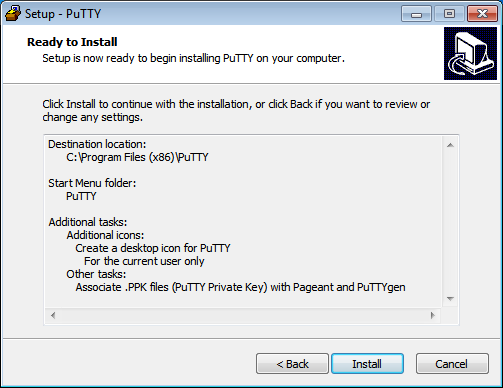
Step 5: PuTTY is ready to install. Click the Install button to start the installation process.
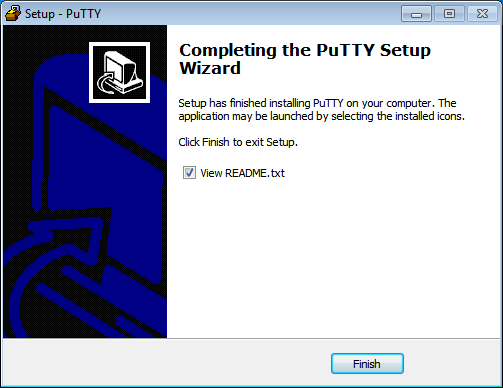
Step 6: Click the Finish button to exit the installer. We recommend reading the README file for further information about PuTTY.
Importing Your SSH Key
We're assuming that rhc setup was already run or that you have completed alternate steps to create an SSH key pair for use with OpenShift. We want to import that key for use with PuTTY.
If you have not run rhc setup, visit the RHC SETUP page and complete the Command Line setup steps before continuing.
rhc setup was already run or that you have completed alternate steps to create an SSH key pair for use with OpenShift. We want to import that key for use with PuTTY.rhc setup, visit the RHC SETUP page and complete the Command Line setup steps before continuing.
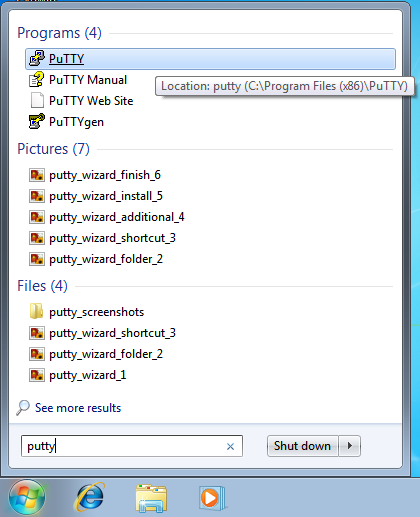
Step 1: Launch PuTTYgen
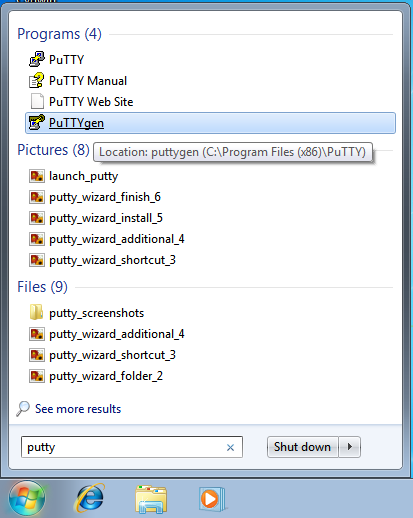
Launch PuTTYgen, the PuTTY key manager. From the Start Menu type putty in the search box. A list of putty applications shows up. Click on PuTTYgen. On older versions of Windows navigate to the PuTTY folder and launch it from there.
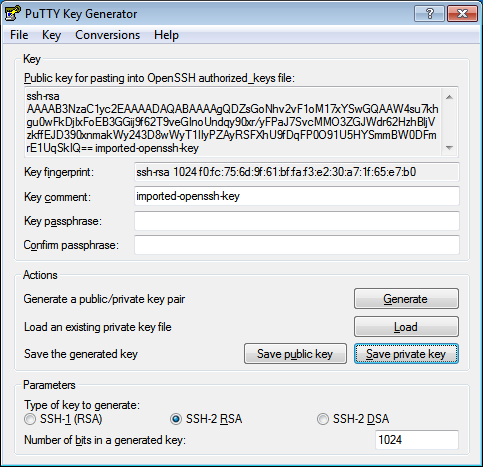
Step 2: Import the SSH Key
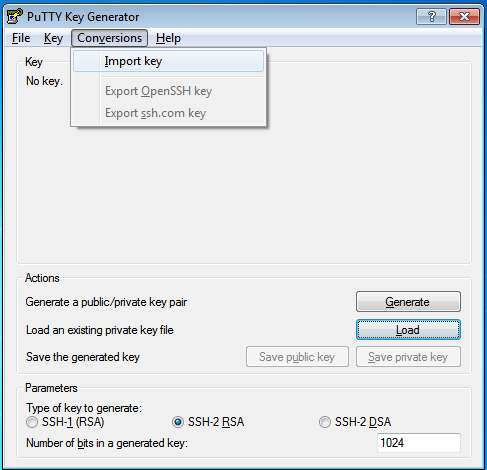
Once PuTTYgen starts go to the Conversions menu and select the Import key item.
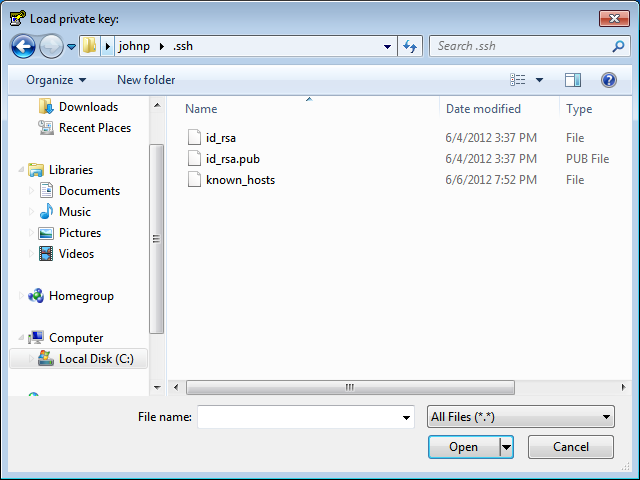
Step 3: Select the SSH Key for Import
A file dialog should pop up. Navigate to the .ssh directory in your user folder C:\Users\<user name>\.ssh and select the id_rsa key that was generated for you by rhc setup.
Step 4: Save the Private Key as a .PPK File
PuTTYgen loads your key and displays it. Click the Save private key button in this dialog.
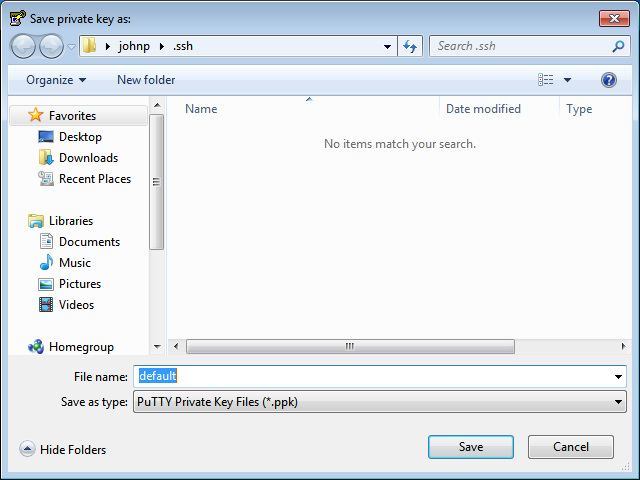
Step 5: Select a Key Name
Another file dialog pops up prompting you for a location to save the key. Again navigate to the .ssh directory in your user folderC:\Users\<user name>\.ssh. Name the key something you will remember and make sure you do not overwrite any files in this directory. Good names to use are default.ppk or id_rsa.ppk.
You've imported your SSH key and may close the PuTTYgen application.
Configuring a Session to Connect to Your Application
We are assuming you've already created an application on OpenShift and now want to configure PuTTY to easily connect to it with SSH.
Step 1: Launch PuTTY
If you selected the option to put an icon on the desktop or a button the start menu, launch PuTTY from there. Otherwise, click on the Start menu and in the search box type in putty. Select the PuTTY application to run. On older versions of windows you may need to navigate to the PuTTY directory in the Start Menu and launch it from there.
Step 2: Get the SSH Address
Now we need to get the ssh address of your application to enter into PuTTY. The easiest way to find the SSH address is find it in the applications list page of the web console and click on your application to reach the details page. Once on the details page, click on the Want to log in to your application? link to expand the text. This text includes the ssh command and the address. In the next step, copy this text, removing the ssh command from the front of the string.

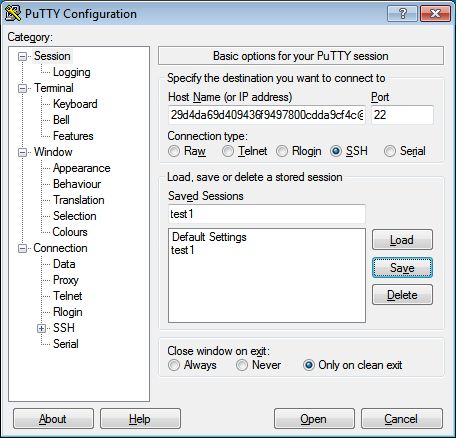
Step 3: Enter the Address into PuTTY
In the Session category, under the Host Name form, paste the text you copied from the previous step, remembering to remove thessh command from the begining of the string.
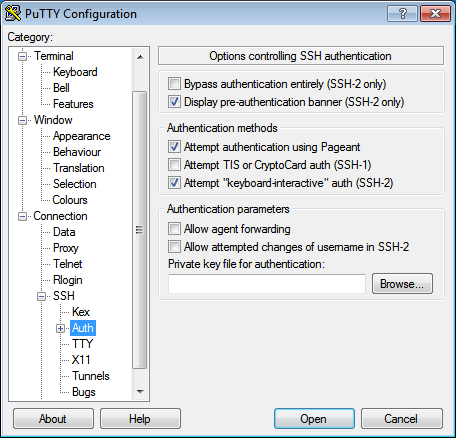
Step 4: Associate Your SSH Key with the Session
In the Category tree, expand the Connection and then SSH categories and select Auth. Click on the Browse button and navigate to the .ssh directory in your user folder C:\Users\<user name>\.ssh and select the .ppk file you saved there.
Step 5: Save Your Session
In the Category tree go back to the Session category. In the Saved Sessions form name your session. We recommend using the name of your application. Click the save button and watch it pop up in the list.
Click the Open button to connect to your application.
Whenever you wish to connect to your application, simply select your session in the list. Click on the Load button and then click on the Open button.
Now You Are Ready to Connect to Your OpenShift Application with SSH on Windows
See the SSH page for a list of commands and things you can inside of an SSH session using your Windows machine.
This is for windows users. What steps to take for Linux?
ReplyDeletewe don't consider linux users as our target audience... :)
ReplyDeleteI think linux is also same process using SSH tools and puttygen unix tools.
ReplyDeleteI will write a separate post for linux users. Meanwhile you can checkout this
Openshift ssh remote connection using puttygen
I think linux is also same process using SSH tools and puttygen unix tools.
ReplyDeleteI will write a separate post for linux users. Meanwhile you can checkout this
Openshift ssh remote connection using puttygen